How To Use Pinterest To Market Your Business – Seven Steps To Success
Knowing how to use Pinterest to market your business is fast becoming a must have skill. Most of us will have joined Pinterest as a way of looking at pretty things to make, do or wear. We will have pinned other people’s posts based mainly on the picture, without really reading any post it was linked to.
We will have followed our friends and maybe a couple of others that were recommended to us by Pinterest based on our likes. Our boards were created without much thought and often pins ended up in the wrong categories but hey it didn’t matter then did it?
But now you see that Pinterest has evolved and people are advertising their businesses there and you want to too.
The first thing many people do is to start a whole new account for their business. My suggestion is don’t do this. When people follow you, they want to follow a whole person and your Pinterest boards will reflect you, the real person behind the business. Don’t panic if you have pinned things that may reflect badly we can sort this later.
Here are the Seven Steps to Pinterest success.
Step One:
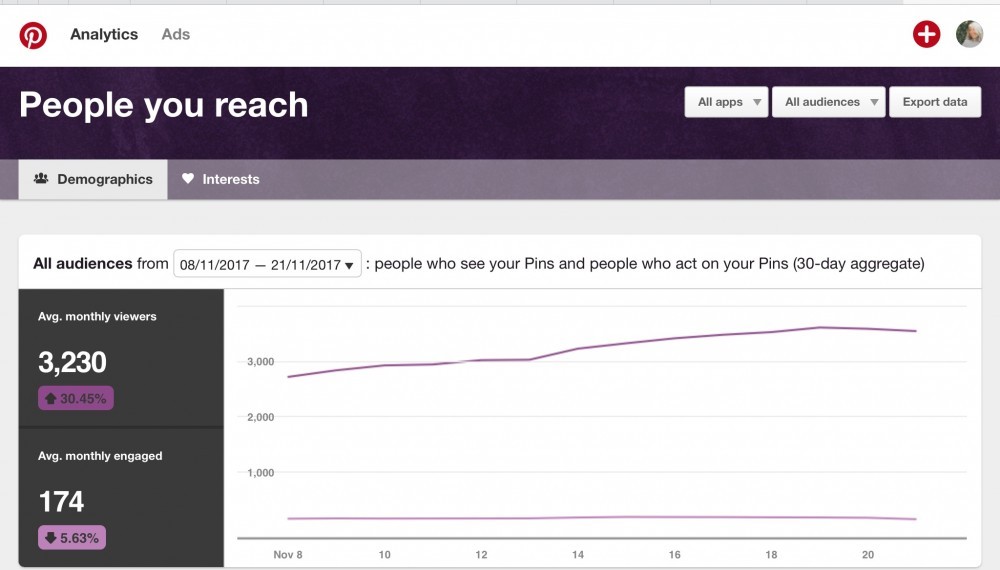
Register your Pinterest account as a Business. You will not be able to pin from your website if you don’t. Doing this also enables you to get analytics for your profile so you can see what is working and what’s not. Though it is not said, business profiles do seem to get seen in people’s feeds more often. You might not get many followers but people will see and pin your work more often.
Upgrade your profile. Put an image of yourself on there, write a description and add your website. You need to go to the Cog in the top right hand corner and then choose edit profile to do this.
Step Three:
Organise your boards. If your boards are a little like mine were, then your boards will be a big mismatch of things. Now you can organise them for your own and your followers benefit. The whole point of this exercise is to make your Pinterest profile visitor friendly.
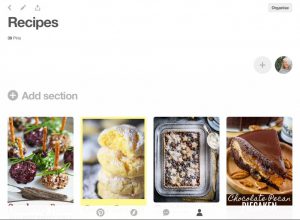
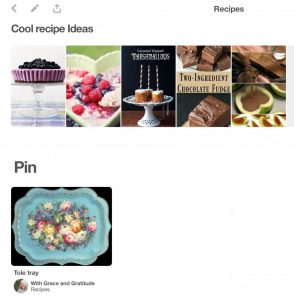
Go to board and click organise. Now create a section. In my example here I organised my Recipes board and chose Christmas Recipes as section name. I then clicked on all the posts I wanted in there and then clicked done.
Create new sections and Move them until you have no pins left hanging around. You will see these under your newly created sections.
If there is something you can’t put in a section, you can choose to delete it. I had a random vintage tray in there and as it wasn’t so useful to me or my visitors I chose to delete.
Some boards will not need organising and you can delete a whole board if you want to. You can also make a board private if you want to keep it, but do not want visitors or followers to see it.
Create a board that you can pin posts from your websites to. In my case it is Website and Blogs and Toy Poodles but I don’t limit myself to just my own posts in here. It is also a good idea to have some similar themed boards but with different names. You can then pin the same post to several boards, giving you more scope and chances of your pins being saved.
Step Four:
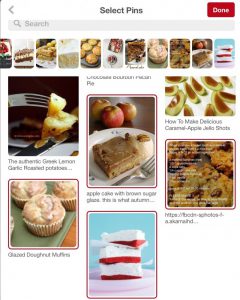
Pin from your website. Get a URL of a post you want to Pin to Pinterest. Make sure it has a great image in the post that you can use. When you open Pinterest you should get a Black “Do you want to copy link” sign at the bottom. Click on this but you have to be quick because it doesn’t stay there long.
Choose what Image you want to use. Write some engaging comment next to the Image. Choose Board and post.
Alternatively you can go to your profile page and click the + sign and choose “Pin copied Link” and then paste your link. Choose image, and Board in the same way. You can choose to pin your website as a whole if you want to but I think more targeted post Pins are more effective.
Step Five:
Advertise your Pinterest profile. Make sure you have the options for people to pin from your website and to follow you. There are lots of social media plugins you can choose.
Make sure that your Pinterest profile is on all of your other Social media accounts.
Follow people and pin their posts. Make yourself known by interacting with others on Pinterest. You can also join Pinterest groups but that is a whole post on its own.
Step Six :
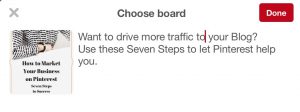
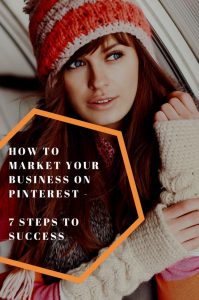
Make some creatives. You will have seen lots of lovely Pinterest Pins with obvious Business messages in them. Here are two that I made in my creative platform Canva for this post.
Can I just add here that I am very uncreative and very untechnical. Having Canva makes my life easy. You can get a free months trial and then if you like it is $12.95 a month. Worth every penny for me. They also do a free forever plan but it is more limited in what you can do. That said a lot of people only use the free plan and get by just nicely.
Once you have some creatives you can Pin these by choosing Photo instead of Copied link or Website from the + sign option on your profile. Make sure you add the URL you want people to go to in the description next to image.
You can also create Rich Pins you can learn how to do this by reading my training on this by clicking here. https://my.wealthyaffiliate.co…
Step Seven:
Plan a pinning schedule. If you are going to market your business on Pinterest successfully you need to put in consistent effort over a period of time. I read that one successful blogger Pins up to 30 times a day. I personally think that might be overkill but do aim for at least 10 a day. Pinning that many times could be time consuming and needs some planning and organising.
“If you fail to plan, you plan to fail” has long been a mantra I have strived to achieve. I’m not naturally an organised person and definitely need help. I found that help with Tailwind. With Tailwind, I can schedule all of my pins in advance and then it will do the pinning for me. I try to plan them out once a week and it can take me about 30 minutes to do and then I leave it to do the work. If I have a change of heart over my Pins then I can always go in and re organise them. And yes you do re pin the same pin several times.
The best part about Tailwind is that it tells you when the best time to pin is based on your visitors habits, you can also use it for Instagram, though you do have to manually pin them. Another great asset of Tailwind is their tribes, but that’s another whole new post.
You can join Tailwind for free and there is no time limit for the free trial.You can schedule up to 100 pins on Pinterest, and 30 posts on Instagram before deciding if a paid plan is right for you. No payment details are needed. If you join on this link it will also give you your first paid month worth $15 for free too.
I hope you are able to follow these seven steps to make Pinterest work for you and your business. If you have any questions please do not hesitate to ask in the comments sections below. I will get back to you as soon as I can.
If you want to follow me on Pinterest…… Please do and re pin a few things too. Well there’s no harm in asking is there?
Thank you for this post! I have been wanting to start marketing my blog through Pinterest but I always thought it would take a lot of effort, learning about tailwind is Super helpful..will be upping my pinterest game..
Thank you for reading Kinan,
I would not be without Tailwind it is a godsend for scheduling. Don’t forget to click my link to get your $15 or first month for free. https://www.tailwindapp.com/i/withgraceandgratitude
Hi Karen, This is really helpful- thankyou! Question: How do I create pins which have my shop info (size and price of product) listed alongside the image? I have Rich Pins enabled but cannot seem to make it work.
Hi Faith and thank you for reading,
To get your Rich Pins to show prices etc you need to adopt them as product pins. You should have had a list of options for the type of pins you want when you set up your rich pins. You can go back and change your options but it will mean all of your pins will be featured in this way.
I personally haven’t taken any option on my pins as they are general subjects and not all product based.
I hope this helps and apologies for late reply… Christmas!
With Grace and Gratitude
Karen


Kinan
atThank you for this post! I have been wanting to start marketing my blog through Pinterest but I always thought it would take a lot of effort, learning about tailwind is Super helpful..will be upping my pinterest game..
Karen Noone
atThank you for reading Kinan,
I would not be without Tailwind it is a godsend for scheduling. Don’t forget to click my link to get your $15 or first month for free. https://www.tailwindapp.com/i/withgraceandgratitude
Faith
atHi Karen, This is really helpful- thankyou! Question: How do I create pins which have my shop info (size and price of product) listed alongside the image? I have Rich Pins enabled but cannot seem to make it work.
Karen Noone
atHi Faith and thank you for reading,
To get your Rich Pins to show prices etc you need to adopt them as product pins. You should have had a list of options for the type of pins you want when you set up your rich pins. You can go back and change your options but it will mean all of your pins will be featured in this way.
I personally haven’t taken any option on my pins as they are general subjects and not all product based.
I hope this helps and apologies for late reply… Christmas!
With Grace and Gratitude
Karen